Showing posts with label Christmas. Show all posts

Tuesday, December 21, 2021

Wonderful Snowflake Card

This is a card I made for my new co-workers to go with the cute last minute ornaments I made for them.  Truthfully, I don't usually give gifts to co-workers. My family isn't even getting gifts from me this year. But everyone at work has been giving each other little things and I really wanted to try these little ornaments I saw in a Facebook craft group made from the Tumbling Tower game blocks (it's like Jenga). They were super easy and fun.


I used mostly paper and stamps that are retired or unavailable, so I won't bother listing them, except the cardstocks are Basic White, Basic Black and Smoky Slate. But I thought you might get some inspiration from this to make a simple card out of paper you have in your stash. I CASED this card from Stampin' Anne. She used current product, so you could check her post out. But I think the Wonderful Snowflakes (that I also used) are not unavailable. They aren't retiring, but I believe they are out of stock and won't be available again until next year. 

If you don't have a Stampin' Up! demonstrator already, please choose me as your demo on your next Stampin' Up! order so that I can afford to buy all the pretty things. Ha ha! 

Just click on "Find a Demonstrator" at the top of the Stampin' Up! website. Then, type my name in the search bar (Chelle Scott). 

And, as always, thanks so much for stopping by! 


Tuesday, December 7, 2021

Painted Christmas!

OMG. I FINALLY used my favorite favorite stamp set in the mini catalog. Isn’t this gorgeous?! The sentiment is way retired. I don't even know what set it is from. It may not even be Stampin' Up! I kept it because I love that font. 

I kind of wish I would have used a different designer series paper for the background because I didn’t realize how much the stamps would totally twin with it lol. But, it is what it is. Because I think this card took like nine years to make. Lol. There was SO MUCH stamping and die cutting. I think it was totally worth it though! 


Also, maybe I should start sending some of these out? I’m having too much fun making them!

Supplies

Cardstock: Basic White, Evening Evergreen, Real Red
Designer Series Paper: Painted Christmas
Stamps: Uknown (old from my stash)
Dies: Seasonal Labels
Ink: Versamark Watermark Pad w/White Heat Embossing
Adhesive: Stampin' Seal and Tombow Multipurpose Glue

If you don't have a Stampin' Up! demonstrator already, please choose me as your demo on your next Stampin' Up! order so that I can afford to buy all the pretty things. Ha ha! 

Just click on "Find a Demonstrator" at the top of the Stampin' Up! website. Then, type my name in the search bar (Chelle Scott). 

And, as always, thanks so much for stopping by! 


Thursday, December 2, 2021

Beautiful Gifts of Christmas

I managed to make my card today with mostly current Stampin’ Up! product. I just had to sneak in the Be Dazzling specialty paper. It’s so pretty! 

I used the October 2021 SheetLoad of Cards template from the Call me Crafty Al YouTube channel to design this card. I honestly didn't think I liked this template, but once I started my cards, I quickly changed my mind. 


Those little red berries were a pain to stick on! Lol. But, totally worth it. 

Supplies

Cardstock: Whisper White, Real Red
Designer Series Paper: Tidings of Christmas
Stamps: Inspirational Thoughts
Dies: Christmas Trimmings, Rectangle Stitched Framelits
Ink: Memento Tuxedo Black
Adhesive: Stampin' Seal and Tombow Multipurpose Glue

If you don't have a Stampin' Up! demonstrator already, please choose me as your demo on your next Stampin' Up! order so that I can afford to buy all the pretty things. Ha ha! 

Just click on "Find a Demonstrator" at the top of the Stampin' Up! website. Then, type my name in the search bar (Chelle Scott). 

And, as always, thanks so much for stopping by! 


Tuesday, November 30, 2021

Christmas Pinecone Card

I cannot believe I haven’t shared anything from the Painted Christmas Suite yet. It is my absolute favorite holiday set, probably ever. Yes, for real! I didn’t get the sentiment stamps because I have tons of Christmas sentiments. I  kinda wish I would have now though. There are SO MANY great cards out there with that set. I fell in love with the Christmas Pinecone dies and HAD to have them. Then, the Christmas Season stamp set was just gorgeous. And, oh the DSP.! *Swoon*. I can’t bring myself to cut it. It’s so dang pretty.

I love Christmas. It reminds me very much of my mom. Plus, I think gifts are my giving love language.


I forgot to take a picture of the inside. You can see on the edges of the cards that I put a small strip of the Tidings of Christmas DSP on the inside. I like to use my small leftover pieces for decorating the insides of cards. Oh well. It's just a strip of paper, ha ha.  I'm sure you can imagine what it looks like :)

On that lighter green foliage, I thought I had grabbed Soft Succulent, but it looked much brighter. Turns out, it was Just Jade. But I like the look. And, I couldn't decide on placement of pinecones or ribbon color. So. I did one of each lol. Which one do you like better? I think I love the gold. 

Supplies

Cardstock: Whisper White, Just Jade, Evening Evergreen, Soft Suede and early Espresso
Stamps: Evergreen Elegance
Dies: Christmas Pinecone, Stitched So Sweetly
Ink: Evening Evergreen
Adhesive: Stampin' Seal and Tombow Multipurpose Glue
Other Supplies: Wonderful Gems, Real Red 3/8" Sheer Ribbon, Gold 3/8" Shimmer Ribbon

If you don't have a Stampin' Up! demonstrator already, please choose me as your demo on your next Stampin' Up! order so that I can afford to buy all the pretty things. Ha ha! 

Just click on "Find a Demonstrator" at the top of the Stampin' Up! website. Then, type my name in the search bar (Chelle Scott). 

And, as always, thanks so much for stopping by! 


Sunday, November 28, 2021

Tidings of Christmas

Today I am sharing a card with you using the September 2021 SheetLoad of Cards template along with some totally current Stampin’ Up! product. Look at me go lol. I hardly ever use current Stampin' Up! product because I am a hoarder and I want to keep it forever. Ha ha! Not a good thing if you're a demonstrator that is selling, but I am just a hobby demo. So I do what I want :)


I just love this DSP. It is just simple and timeless, which I love. And the colors are gorgeous. 

Supplies

Cardstock: Crumb Cake, Basic White
Designer Series Paper: Tidings of Christmas
Stamps: Peaceful Cabin
Dies: Christmas Trimmings
Ink: Memento Tuxedo Black
Adhesive: Stampin' Seal Adhesive
Other Supplies: Wonderful Gems

If you don't have a Stampin' Up! demonstrator already, please choose me as your demo on your next Stampin' Up! order so that I can afford to buy all the pretty things. Ha ha! 

Just click on "Find a Demonstrator" at the top of the Stampin' Up! website. Then, type my name in the search bar (Chelle Scott). 

And, as always, thanks so much for stopping by! 


Sunday, November 21, 2021

Peaceful Cabin Loveliness

I thought I might show you something made with some current product today. I CASEd this card from Chris Smith,a fellow Stampin' Up! demonstrator. Isn’t it gorgeous?! The only thing used on this card that is retired is the snowflake DSP. But you could totally make a similar design with snowflake stamps embossed in white on red cardstock.

I loved this card so much that I made 8 of them to send out to friends/family this year. 


Stampin' Up! Supplies
Cardstock: Real Red, Basic White, Basic Black
Designer Series Paper: Peaceful Prints (retired)
Stamps: Peaceful Cabin
Ink: Momento Tuxedo Black
Embellishments: Subtle Shimmer Sequins, Black & White 1/4" Gingham Ribbon
Other: Stampin' Seal, Multipurpose Liquid Glue

Of you don't have a Stampin' Up! demonstrator already, please choose me as your demo on your next Stampin' Up! order so that I can afford to buy all the pretty things. Ha ha! 

Just click on "Find a Demonstrator" at the top of the Stampin' Up! website. Then, type my name in the search bar (Chelle Scott). 

And, as always, thanks a heap for stopping by! 


Tuesday, November 16, 2021

Detailed Deer Set of Christmas Cards

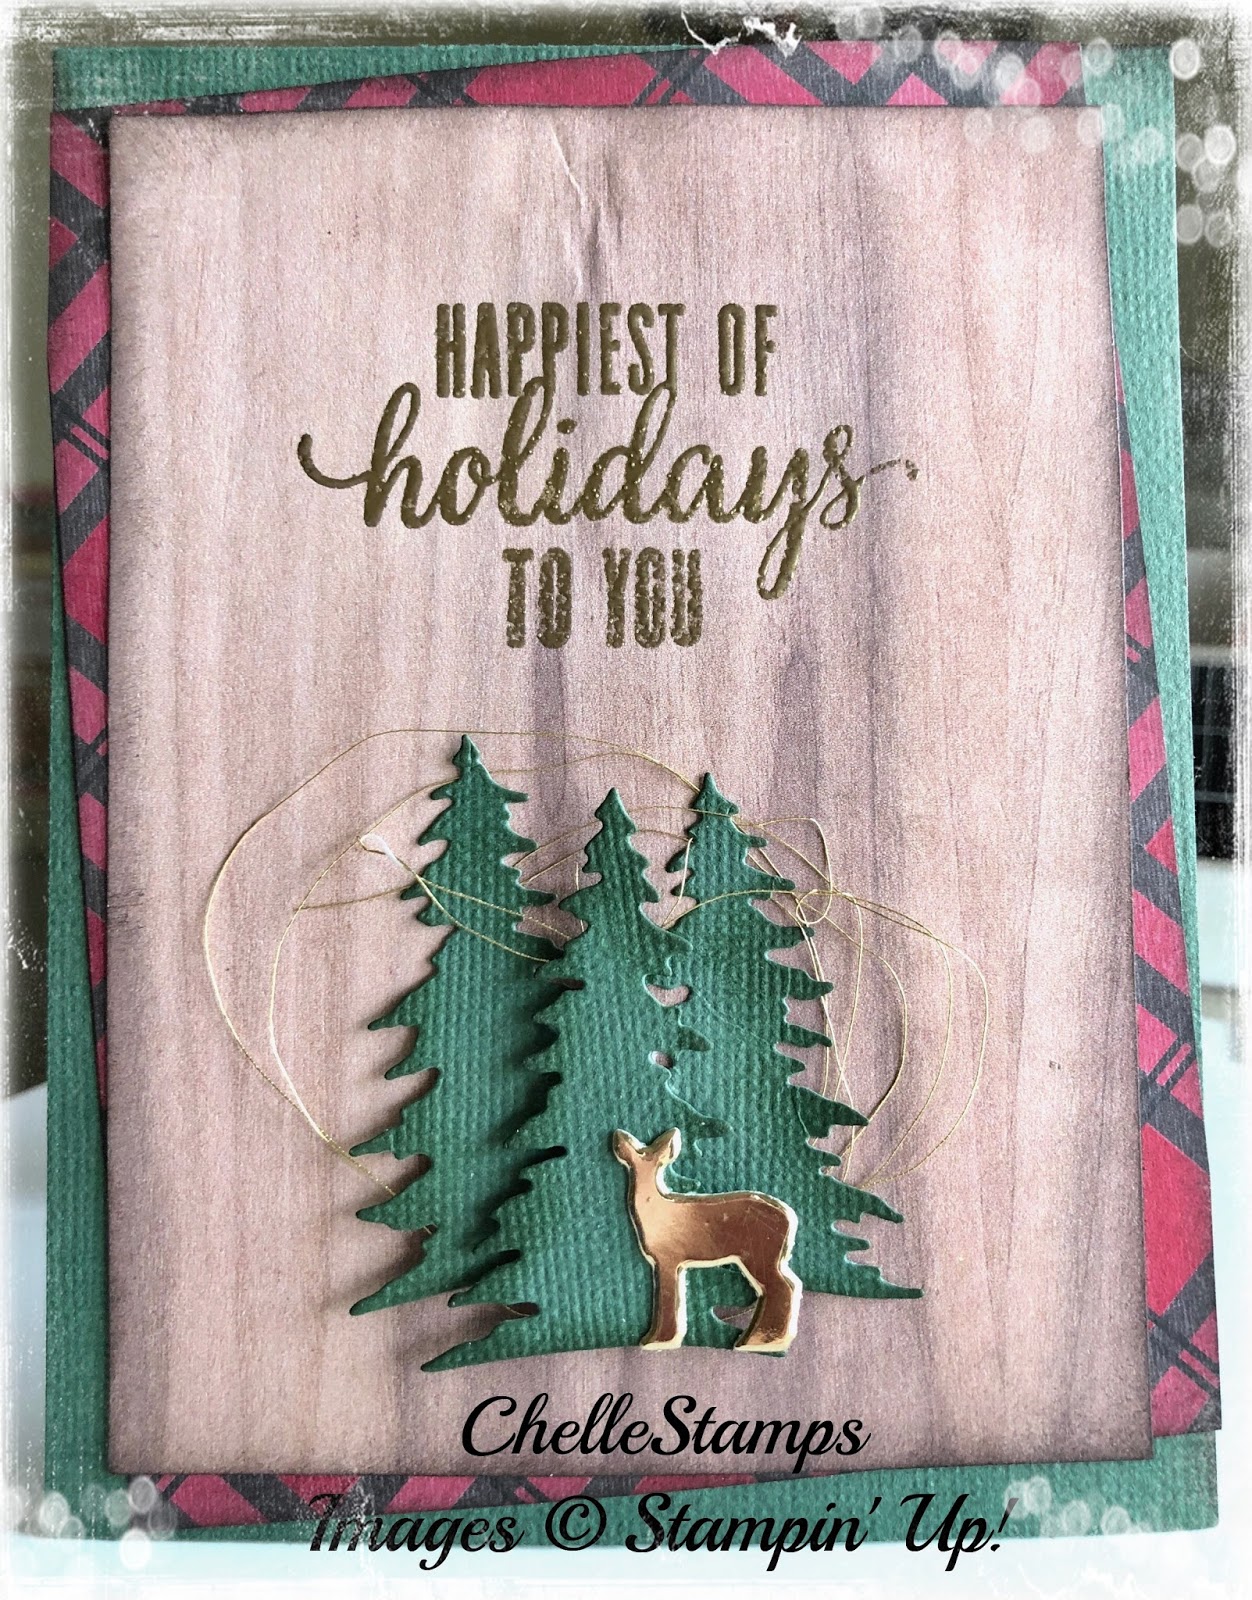
I'm back again today with another set of Christmas cards made using the SheetLoad of cards templates from Call Me Crafty Al on YouTube. If anyone actually reads this blog, they'll probably get sick of hearing about her channel lol. But I do feel like I need to give credit to her for the template/sketch. 

On to the card. I love this card, and this sketch. I actually made two previous sets of cards using this same template in August when it was released. I'll leave both sets below. I won't bore you with the details of the product I used because it is all retired/unavailable except the stamp and the butterfly die I used on the friendship card. If you would like details for any product used, just leave a comment. I'd be happy to tell you what I can. 


The below set is really a beautiful set of cards. I hate making sympathy cards, because I don't ever want to use them. But, they are handy to have around when you do need them. 


I feel like I should apologize for my photo quality here loo. I usually craft at night, since I work during the day, and rarely get into the craft room in time to get a good photo in natural light. Oh well. I'm not trying to win a photography contest, I suppose :)

As I mentioned before, the stamp and the butterfly die on this card are still available. The stamp set is the Forever Fern set from Stampin' Up!, and the die is from the Brilliant Wings Dies.

If you want to know what products I used to make any of these, just shoot me a message or comment on this blog post. Becasue frankly, I'm just too lazy to put it all down here ;) 

And, if you don't have a Stampin' Up! demonstrator already, please choose me as your demo on your next Stampin' Up! order so that I can afford to buy all the pretty things. Ha ha! 

Just click on "Find a Demonstrator" at the top of the Stampin' Up! website. Then, type my name in the search bar (Chelle Scott). 

And, as always, thanks a heap for stopping by! 

Sunday, November 14, 2021

Fun Making A "SheetLoad" of Cards

You guys, I found the best thing for creating multiple cards without having to think too much lol. Sometimes I spend more time looking for an idea than I do actually making the cards. I have made it no secret that I don't usually ever come up with a card design on my own. I love to make them, but I find the ones that I create on my own feel boring to me. And why would I want to spend all the time trying to make a unique design when it is more fun for me to just recreate one that is already designed? Don't get me wrong, I don't think it's ok to steal other people's ideas. I think you should give credit for the design whenever you know whose it is. But, I do think it is ok to reproduce it if you aren't selling it or presenting it as your own design. In my opinion, it is the highest form of flattery if someone CASEs (copy and share everything) your work. 

Anyway, this particular card sketch/design is the November 2021 SheetLoad from Call Me Crafty Al on YouTube. She has a series called SheetLoad of Cards. You should totally check it out. She comes out with a new card sketch/design each month to help you make multiple cards in one design (i.e., a SheetLoad of cards). Each month there is a unique hashtag and then there are hashtags to follow all of the social media post for SheetLoad (#sheetloadofcards, #showusyoursheetload, #suysNov2021). 


I especially love this month's SheetLoad because it utilizes my 6X6 paper pads. I love those things, but I hardly ever reach for them. I used the Farmhouse Christmas paper pad from Carta Bella--so good! I also used some new-to-me embellishments--those flat glitter tickers that look like rhinestones. Umm....hello, these will change my life! Ha, not really. But, they will make my cards easier to mail without spending a fortune on the non-machinable post office up-charge.

Did you notice that not one of these cards is exactly the same? I love that too! That isn't always the case for the templates, so I really liked that this month. 

Well, that's all for me today. I hope you enjoyed this post. I really enjoyed making the cards. Let me know if you have heard of SheetLoad or if you check it out, what do you think of it? 

Sunday, July 5, 2020

Christmas in July

Around July each year I start thinking about Christmas lol. Not because I want it to come, but because there are lots of paper crafting events for Christmas in July. In regard to cards, I think this is because lots of us avid paper crafters make our own Christmas cards. And lots of us make lots of cards!

Last year I actually didn't send Christmas cards because I fell in love with some Autumn designer series paper that I really wanted to use. So I ended up sending Thanksgiving cards instead. And, to be honest, that might be a new tradition for me. I love all things fall. We take our family vacation at the beginning of fall and it just seems like it kicks off the best parts of the year for me.

But, to that end, I always end up with all these really pretty Christmas papers in my stash that don't get used. But, I had to have them you know? They're so pretty! I don't scrapbook Christmas anymore. Truthfully, it's a lot less fun when your kids are older. Maybe when I have grands someday....

So, since I was thinking of Christmas I decided to make a card. I had a lot of fun, and I'm so glad I used that greenery sheet from the Stampin' Up! All is Bright DSP from last year (retired, sorry). I just loved it so much and was happy to finally play with it.


This fun fold design is so fun. I believe it is called a buckle fold. I found a video tutorial on Lisa Curcio's YouTube channel, and had to give it a go. I like having a bit of a unique twist on my cards, especially if it lets me use lots of big pieces of pattern. Love me some patterned paper!

If you have questions about anything used on this card, just send me a message or leave a comment. 

Thanks for stopping by today! 


Monday, December 4, 2017

My DIY Christmas Ball Wreath

Well folks, life got hectic on me and I haven't posted in nearly a month. But, I am back, so let's get to it.

I don't have a card or stamped creation to share with you today. But I do have a crafty item!


I decided to join a December Photo A Day challenge this year. Today's prompt was "Joyful".

I love Christmas, and I love making my own decorations. I get that from my mom. She was crafty and loved Christmas too. So, I always think a lot about her in December and while I'm crafting. This makes me joyful :)

I especially like to make my own wreaths. I don't have a lot of room in our small home (900 square ft) to decorate. So the door is usually one of the few places that gets any holiday attention (except during Christmas time of course).

I didn't make a tutorial for this wreath because there are literally hundreds on Pinterest. You can just search "Christmas Ornament Wreath" and find a crap ton. Lol. But I still wanted to show you what I ended up with. Isn't it pretty? I love it. But don't look too close. There is a lot of hot glue, and you can see some of it. But I think I did pretty good for my first time.


I will share that this wreath costs a lot more to make than one might think (or hope) lol. I originally thought I could just buy like 4-6 sleeves of Christmas ball ornaments from Dollar Tree and then an inexpensive wreath form from Hobby Lobby. I think I probably ended up buying double (or more) the amount of ball ornaments. But the whole wreath still only cost me less than $20. The wreath was relatively inexpensive. I think I paid like $4 with a coupon. Not too bad. And I had boat loads of glue sticks in my stash.

As always, thank you so much for stopping by. I hope you found something interesting to inspire you here today.


Wednesday, November 15, 2017

Night of Navy Gingham Snowflake Card

Hello stampy friends. I just thought I'd share a card I made a week or so ago. I forgot to share it when I made it. I had been in a cardmaking slump. No inspiration at all. Then I found a card by Nadine's Stampin' Club that was very similar while perusing Pinterest and thought, "Hey, I could do something like that." I was itching to use the Winter Wonder embossing folder again, and I've never even cracked my gingham ribbon open, so this seemed perfect.


I really like the Night of Navy with the Smoky Slate cardstock. I think it gives it a bit of a more elegant feel.


I had an extra piece of cardstock that had been embossed with the Winter Wonder folder, so I decided to use that for the writing panel inside of the card.


I used the following Stampin' Up! products available for purchase in my SU store at the link in the sidebar :) 
Cardstock: Night of Navy, Smoky Slate, Whisper White
Ink Pads: Night of Navy
Stamp Sets: Star of Light
Adhesives: Snail Adhesive 
Other Accessories: Winter Wonder Textured Impressions Embossing Folder, Night of Navy Gingham Ribbon, Rhinestone Basic Jewels

As always, thank you so much for stopping by. I hope you found something interesting to inspire you here today.


Monday, November 13, 2017

Pining for Plaid

Hey there! I'm back. Three days in a row. I'm impressed with myself :) This won't keep up though. I just don't have time with a full time job during the week (boo!). But it has been nice to be able to take some time to create and use the stuff I have. It does me a world of good to play with paper and ink.

I'm still playing with the sentiment stamps from my October Paper Pumpkin kit. I think the name of it is "Pining for Plaid". I should have mentioned that previously.


This card was pretty much CASED from one by Susan Campfield. Check her card out here
I used the sentiment stamp from the Pining for Plaid set along with the dies from Card Front Builder Thinlets, some current and retired designer series papers, metallic thread, and some contraband (non-SU cardstock) to create this woodsy looking Christmas card. I think this one will probably belong to my dad. Hope he likes it.


I used the following Stampin' Up! products available for purchase in my SU store at the link in the sidebar :) 
Cardstock: Scraps of gold foil sheets from Stampin' Up. I also used some non-SU cardstock from my stash. I think the color would be similar to Garden Green, 
Designer Series Paper: Wood Textures and Warmth & Cheer (retired)
Ink Pads: Early Espresso, VersaMark
Stamp Sets: Pining for Plaid (Octoer Paper Pumpkin Kit)
Dies: Card Front Builder dies (trees and deer)
Adhesives: Snail Adhesive and Stampin' Dimensionals
Other Accessories: Stampin' Sponges for inking edges, gold metallic thread and gold embossing powder mixed with dazzling diamonds

As always, thank you so much for stopping by. I hope you found something interesting to inspire you here today.


Sunday, November 12, 2017

Joyful Christmas

I so enjoyed making the Christmas cards with my October Paper Pumpkin kit the other day that I was itching to get back in my craftroom and do some more. I am crazy loving the big sentiments in last months kit, so I wanted to use them some more. I think my all time favorite color combo must be black, white and red. I gravitate to that a lot. And today's card proves that it works so well...at least I think so.


I dyed my white/silver edge metallic ribbon with some cherry cobbler reinker. I love the result. It isn't perfect, but I kinda like a little imperfection. I think it looks rustic. Plus, nothing handmade is ever perfect.


Cardstock: Cherry Cobbler, Basic Black
Designer Series Paper: Merry Little Christmas
Ink Pads: Cherry Cobbler
Dies (using Big Shot machine): Layering Circles 
Adhesives: Snail Adhesive and Stampin' Dimensionals

Thank you so much for stopping by. I hope you found something interesting to inspire you here today.


Saturday, November 11, 2017

October 2017 Paper Pumpkin, I'm in Love

So yesterday I finally had a chance to pull out my October Paper Pumpkin kit, and I SO WISH that I had gotten more than one! This is by far the best kit I have ever received from Paper Pumpkin. In fact, over the last few months, I have really enjoyed my kits a lot more than usual. I can't wait for my November Paper Pumpkin now. It is designed to work with the one from October, so I'm super excited. It's too bad I didn't make this post before. Someone might have benefitted from it and been able to order the November kit at least. But the cutoff date was yesterday :(  However--I'm sure there will be more fabulous kits to come. So, if you order, please make sure to choose me (Michelle Scott) as your demonstrator when you order :)

Now, onto the fun--here are my pictures of the project made with my kit. I got all the supplies to make 5 of each style of these cards, plus more that I can use to make future cards! I'm really loving the stamp set in this kit. It's perfect. I'm sure I'll be using it on some holiday cards this year.


The projects were so perfectly designed that I didn't even feel the need to come up with an alternate use or design at all. I just loved what they were designed for. 


Stay tuned for more projects using the stamps in this kit and for the November Paper Pumpkin projects!

Thank you so much for stopping by. I hope you found something interesting to inspire you here today.


Sunday, September 17, 2017

Lovely Christmas

Hey all! I'm back. Kind of. I can't even tell you how exhausting working 65 hours in one week, in the heat, is. It's been a week since I've been back on on a semi-regular schedule, and I'm still tired!

I did find some time to make a card today. It felt good. Like home :)

This card was made using one of my favorite stamp sets, Lovely as a Tree. I've actually bought a replacement set for this one already because my other was wood block, and I like cling mount better. This set will never retire. It holds a special place in the founder, Shelli Gardner's, heart, and she has stated that as long as she has any say, it will remain.


I used the following Stampin' Up! products available for purchase in my SU store at the link in the sidebar :) 
Cardstock: Berry Burst and Whisper White
Ink Pads: Memento Tuxedo Black, Berry Burst, and Tangerine Tango
Stamp Sets: Lovely as a Tree
Tools: Sponges, Big Shot and Pinewood Planks Dynamic Textured Impressions Embossing Folder
Embellishments: Sequins from Iridescent Sequin Assortment

Thank you so much for stopping by. I hope you found something interesting to inspire you here today.


Don't forget to register for Fall Stampfest! Discount for early registration (before Oct 1). Your registration fee includes 8 projects, catered lunch, door prizes, samples galore, demonstrations and a fabulous time with friends! 

Wednesday, August 30, 2017

Carols of Christmas Swap Card

Yes, I am still doing the 100 Days Project along with my scrappy peeps at the Scrap Gals Community group on Facebook. I did end up skipping a couple of days. I've been working long hours and had a couple of family things to go to. Next week I have to work 50+ miles away, so I won't have any time to be crafty. But I'm good with that. I can catch up or just extend my project to reach 100 pieces. Go with the flow, you know?

Anyway, I got a little time to finish up some swaps I've been working on for a demonstrator group I'm in, and I'm super happy with the way they turned out. I have to say, I'm in love with that black and white flannel looking paper. I wish I could buy a whole pack of just that pattern.

I almost forgot to take a picture before I sent them off to swap. So I had to take some in my car. Lighting isn't great, but it'll do.

I used the following Stampin' Up! products available for purchase in my SU store at the link in the sidebar :) 
Cardstock: Cherry Cobbler, Old Olive, Whisper White, Crumb Cake 
Designer Series Paper: Merry Little Christmas 
Ink Pads: Basic Black Archival Ink, Real Red, Old Olive
Stamps: Carols of Christmas
Dies: Stitched Shapes Framelits Dies, 
Punches: Holly Berry Builder PunchRibbon and Trim: Burlap Ribbon
Adhesives: Tear & Tape, Stampin' Dimensionals, Snail Adhesive and a glue gun
Other Accessories: Delicate White Doilies, Crushed Curry Stampin' Write marker

Thank you so much for stopping by. I hope you found something interesting to inspire you here today.


Don't forget to register for Fall Stampfest! Discount for early registration (before Oct 1). Your registration fee includes 8 projects, catered lunch, door prizes, samples galore, demonstrations and a fabulous time with friends!